Want to ditch that unprofessional @gmail.com email address without paying for Google Workspace or Microsoft 365? Whether you’re a freelancer, small business owner, or just want a more professional look, this guide walks you through setting up a free business email — no monthly fees attached.
Let’s dive in.
Why You Need a Business Email
First things first — why bother setting up a business email in the first place? A personalized email like yourname@yourbusiness.com boosts credibility and trust. Imagine contacting a client from john.doe@gmail.com versus john@awesomebusiness.com — which one screams more professional? Exactly.
The good news? You can have that without paying $6 per user per month for Google Workspace. Let’s make it happen.
What You’ll Need:
- A domain name (we’re using Name.com for this tutorial. Use my affiliate link as I earn a commission for each signup at no additional cost to you)
- A Gmail account
- A bit of patience — but trust me, it’s worth it
Step 1: Set Up Email Forwarding at name.com
Most domain registrars (like Name.com) offer free email forwarding. This lets emails sent to yourname@yourbusiness.com land in your regular Gmail inbox. To do so;
- Log into your Name.com account or signup for one if you haven’t already. Please use this affiliate link.
- Go to Email Forwarding settings.
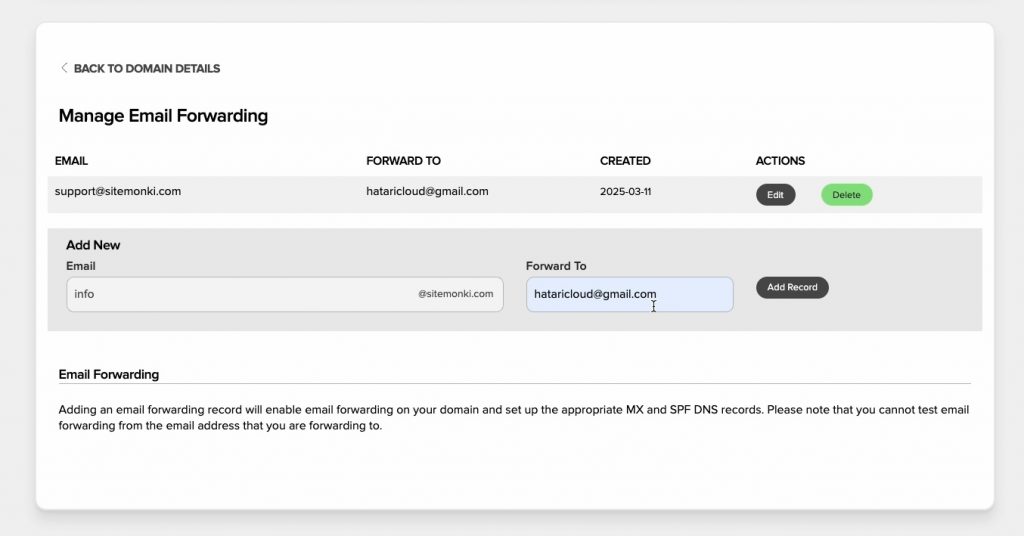
- Add a new forward from
yourname@yourbusiness.comto your Gmail address such as yourname@gmail.com. In my case below, I am forwarding emails from info@sitemonki.com to hataricloud@gmail.com. - Save the settings.
? Why Email Forwarding Matters: This is crucial because it redirects incoming emails from your business address to your personal Gmail inbox — you won’t miss a thing. But this is only half the setup. You’ll still need to send emails from your business address.
When you enable email forwarding for a specific domain, Name.com automatically configures MX records (Mail Exchange records). This ensures Name.com knows where to route your emails.
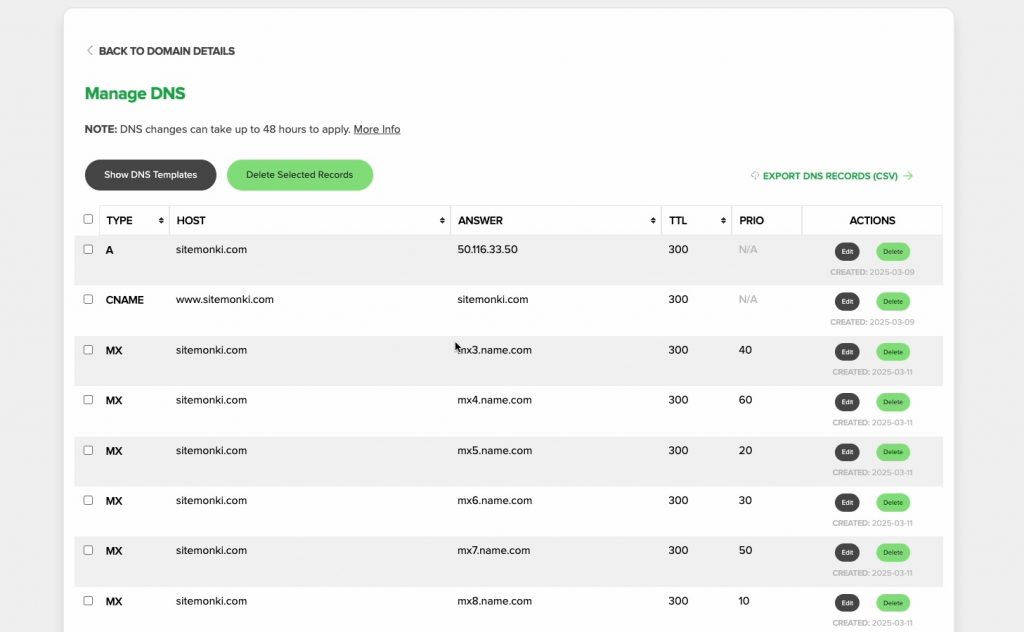
? What Are MX Records? Think of MX records as the traffic director for your email — they tell the internet where to send messages addressed to your domain.
Step 2: Set Up Gmail to Send as Your Business Email
Receiving emails is half the battle — now let’s configure Gmail to send emails from your custom address too. For this, you will have to setup gmail smpt server in your gmail settings.
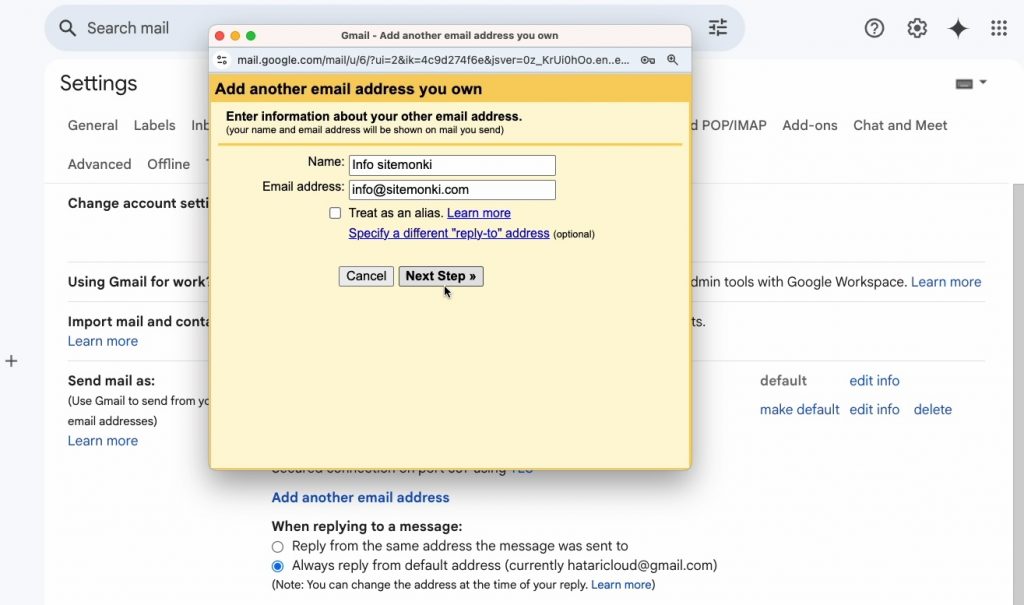
- Open Gmail, click the gear icon, and head to See All Settings.
- Go to the Accounts and Import tab.
- Under Send Mail As, click Add another email address.
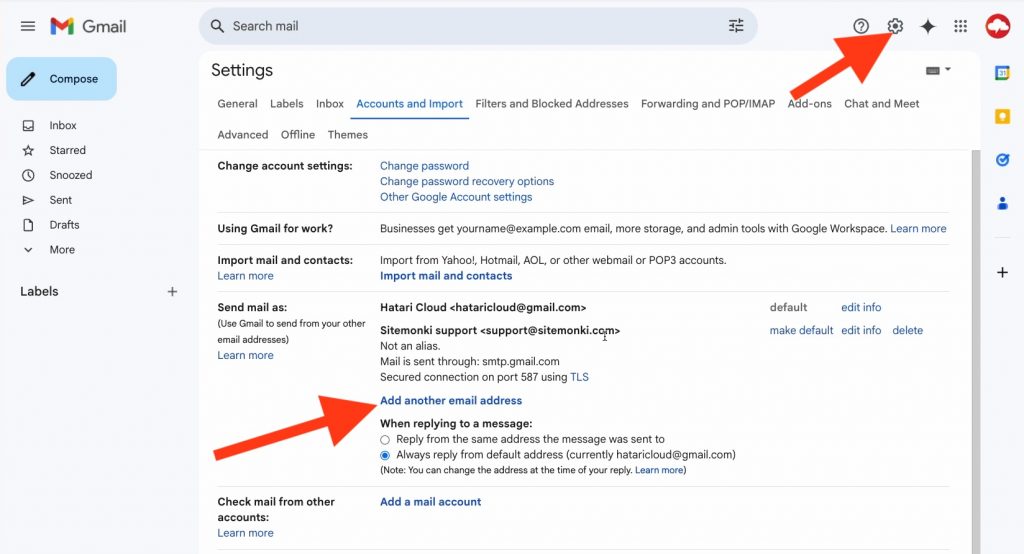
- Enter your business email (
yourname@yourbusiness.com).
- In the SMTP settings:
- SMTP Server:
smtp.gmail.com - Port:
587 - Username: Your Gmail address
- Password: Your Gmail App Password (more on this below)
- SMTP Server:
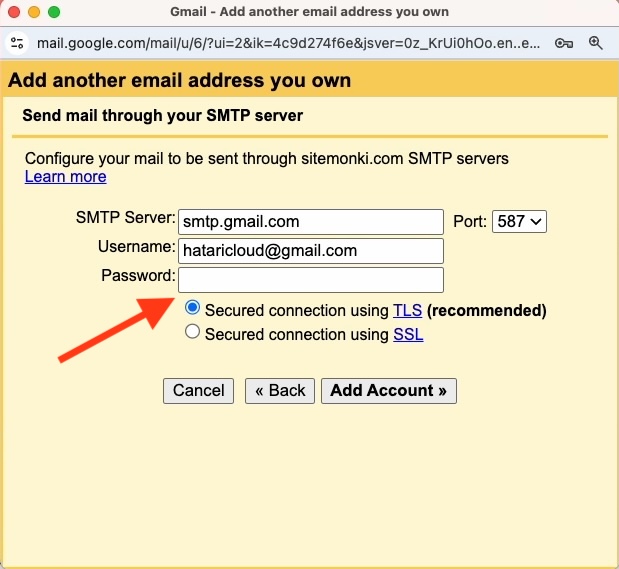
- Hit Add Account — verify the confirmation email.
? About App Passwords: If you have two-factor authentication on (and you should!), Gmail won’t accept your regular password here. Instead, create an App Password:
- Ensure you have signed in to the gmail account you are forwarding emails to and that two-factor authentication is enabled.
- Go to https://myaccount.google.com/apppasswords
- Enter a name for the app specific password. Enter something like Mail
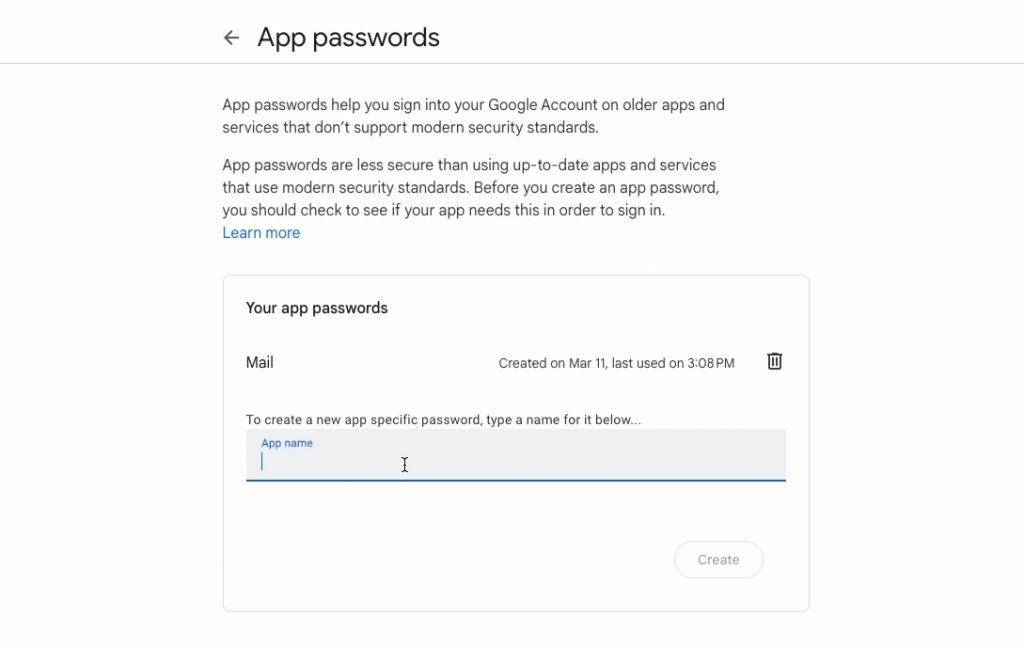
- Click on “Created. An app password will be generated for you.
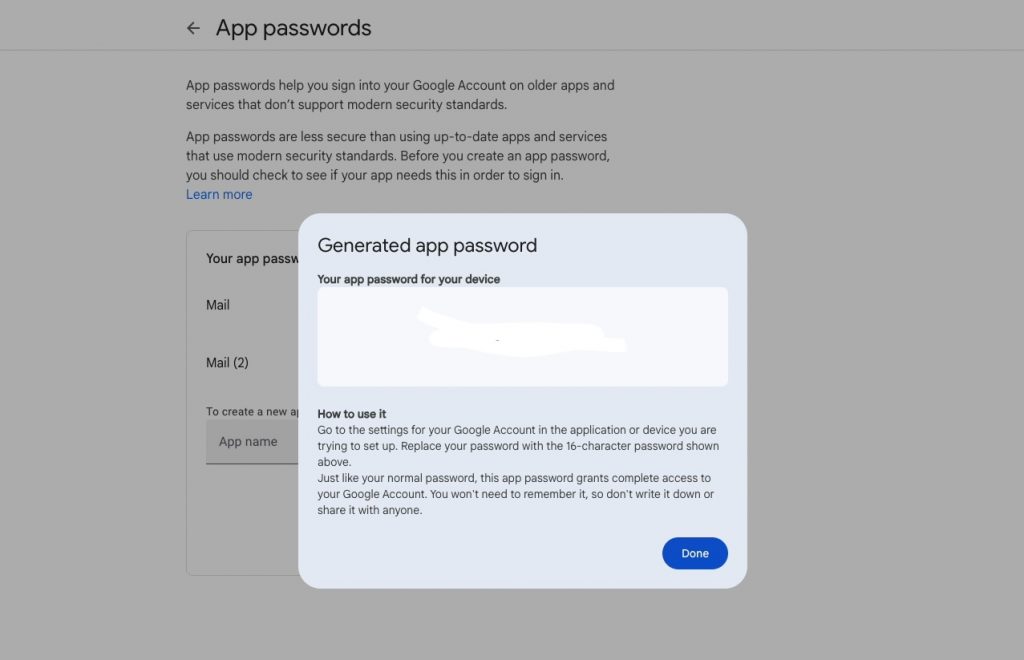
- Copy and paste it into the SMTP setup above under the password field.
? Step 3: Make It Default(Optional)
To avoid accidentally replying from your Gmail, set your business email as the default sender.
- Go back to Accounts and Import.
- Find your business email under Send Mail As and hit Make Default.
You’re Done!
Congrats — you now have a professional business email setup without monthly fees. You’ll send and receive emails from yourname@yourbusiness.com straight from Gmail — and no one will know you didn’t pay a dime for fancy email hosting.
When composing email, simply select your business email in the dropdown menu of the from field. By default, it’s your gmail email which is selected.

Troubleshooting Tips
- Verification email not arriving : Check your Gmail spam/junk folder. Double-check the forwarding address you entered in Name.com (Step 1). Wait a few minutes, as email delivery can sometimes be slightly delayed.
- Cannot add account / SMTP error in Gmail: Carefully verify the SMTP server (smtp.name.com), Port (587), Username (your full custom email address, e.g., yourname@yourbusiness.com), and the App Password (ensure it’s the 16-character password copied exactly, without spaces). Also, confirm “Secured connection using TLS” is selected.
- App Password option missing in Google Account: Make sure 2-Step Verification is definitely enabled and active on your Google Account. The App Password option only appears after 2FA is turned on.
Need Help Setting This Up?
If this feels too technical or you hit a snag, I’ve got you covered! For a $50 one-time fee, I’ll walk you through the entire setup over a Google Meet call — screen sharing included. Go to sitemonki and contact me.
Here’s what you’ll need:
- A domain from Name.com (about $17/year for a .com domain — this is an affiliate link, and I earn a commission at no extra cost to you).
- A Gmail account
Get Support:
- Fill in this form to book a support session
- Or chat live via WhatsApp
Additionally, I prepared a video tutorial if you wish to follow visual guide;
Let’s get your professional email up and running today — no tech headaches required! Happy emailing!